

There is nothing unique about Brighton & Hove Albion’s crossing under Fabian Hurzeler.
They don’t have a trademark move to attack the back post, the near one or the central area.
They are, however, proficient at the basics of attacking open-play crosses, which makes them one of the most dangerous teams in this phase of play in the Premier League.
Brighton’s strengths in attacking open-play crosses lie in their positioning across the goalmouth, timing of their runs inside the penalty area, and the occupation of the opposition’s defenders.
This complements the team’s wingers, Yankuba Minteh and Kaoru Mitoma, whose one-versus-one ability down the wings means that Hurzeler’s side are able to create multiple crossing situations.
Earlier in the season, Minteh’s cross found Mitoma towards the back post to score the only goal in Brighton’s 2-1 defeat against Bournemouth in September, but Yasin Ayari’s dash into the penalty area contributed to the move.
Here, Minteh is in a one-v-one situation against Adrien Truffert, with Mitoma, Danny Welbeck and Georginio Rutter inside the penalty area.
The remainder of Bournemouth’s back four are defending Welbeck and Mitoma, while Tyler Adams is keeping an eye on Rutter.
As Minteh creates a crossing angle for himself, Ayari surges forward. The timing of Ayari’s run as Minteh is playing the cross towards the back post prevents Bournemouth’s defence from shuffling their markers, and overloads the right-back, James Hill.
Hill is therefore unable to commit to Mitoma…

… who has the space to easily head the ball into the empty net.

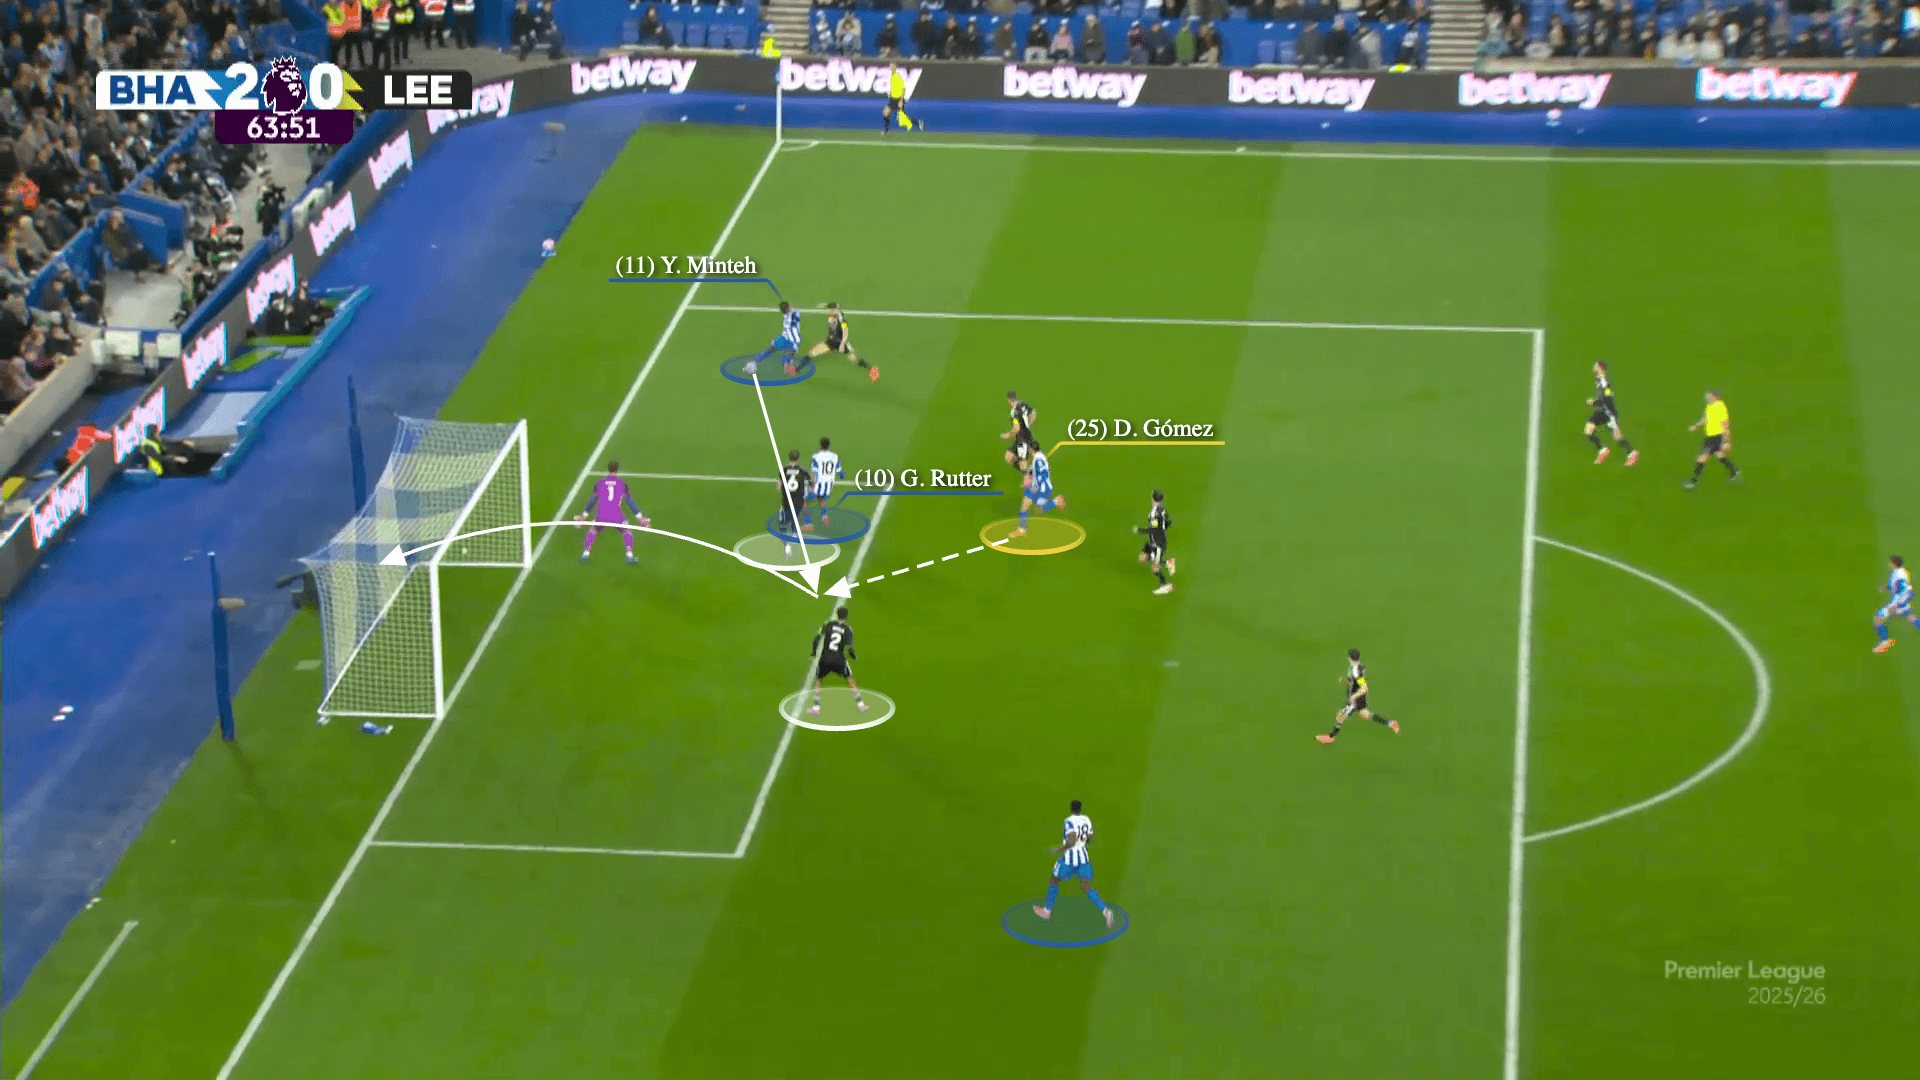
These types of late runs to attack Brighton’s crosses have been a common ocurrence under Hurzeler. In this example, from the 3-0 victory against Leeds United in November, it’s a similar situation, but the goal is scored by the late runner, Diego Gomez.
Initially, Leeds’ left centre-back, Jaka Bijol is out of position to track Gomez, but Jan Paul van Hecke’s long ball to Minteh beats the press and puts the winger in a one-versus-one situation.
As Minteh dribbles past Gabriel Gudmundsson, Rutter attacks the near post and Gomez dashes behind Bijol, with Welbeck in position to threaten the back post.

The positioning of Welbeck prevents Leeds’ right-back, Jayden Bogle, from defending Gomez, and with Joe Rodon dragged towards the near post by Rutter, the Brighton midfielder is able to attack the gap in the opponent’s defence.
Rutter smartly dummies Minteh’s cutback, and Gomez scores into the empty net.
The spread of Welbeck, Gomez and Rutter when attacking the crossing situation in the above example is another feature of Brighton’s open-play crosses.
Hurzeler’s side knows how to position themselves across the penalty area to be able to attack different zones and force the opponent’s defence into unfavourable decisions.
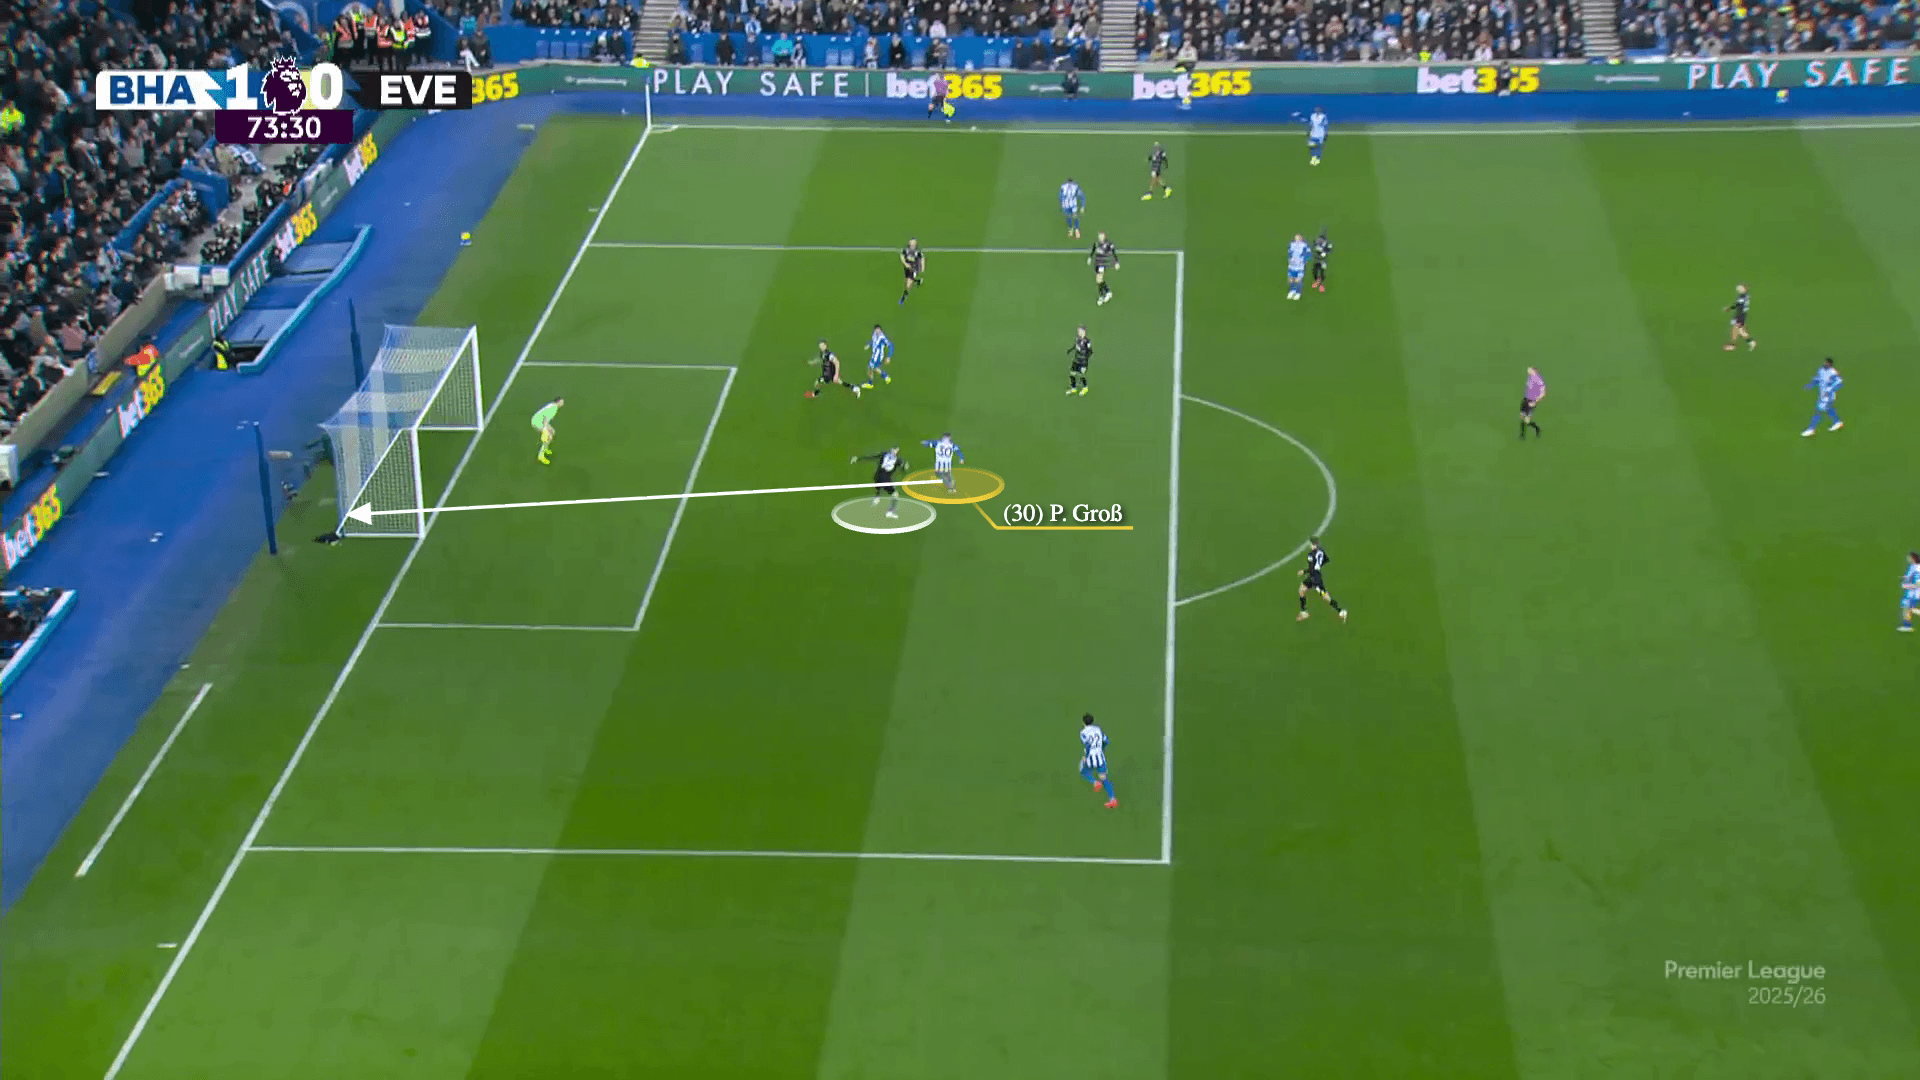
Here, in the 1-1 draw against Everton in January, Brighton’s right-back, Joel Veltman, is in a narrow position and occupies Jarrad Branthwaite to isolate Minteh against Iliman Ndiaye.
Meanwhile, Ayari and Pascal Gross are high up the pitch to be able to attack the potential cross. Normally, the ball is played to Minteh first, but Van Hecke finds Ayari between the lines.
With Branthwaite occupied, the remainder of Everton’s back four need to shift across, but Jake O’Brien is in a tough situation because he has to cover Mitoma and Gross.
The positioning of the Brighton players across the front line and the speed of the move prevents O’Brien from defending Gross in time…

… and the German midfielder slots Ayari’s low cross into the bottom corner.
Brighton often use their full-backs in narrow positions to open up the passing lane into Mitoma and Minteh, and put them in isolated one-versus-one situations down the wing.
This also helps the players attacking the potential cross because it forces the opponent’s defenders to mark Brighton’s narrow full-backs.
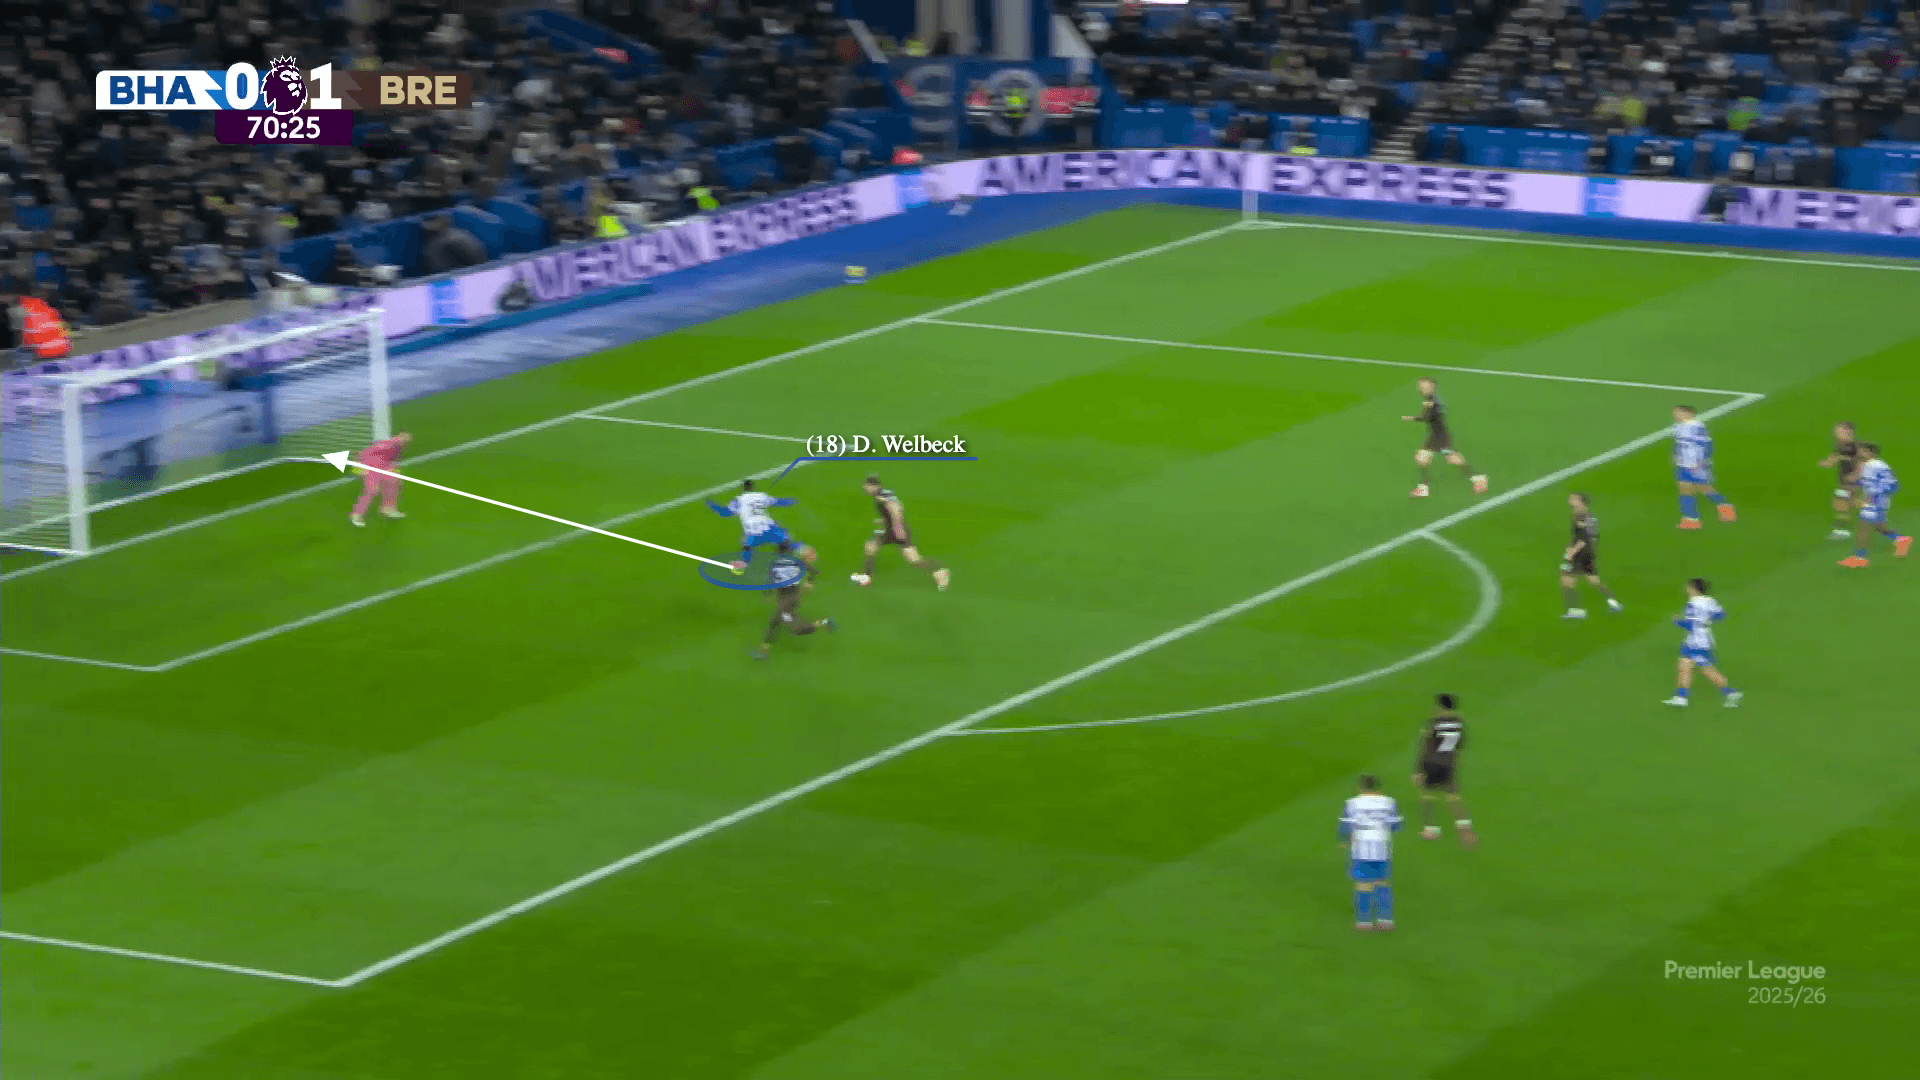
In this example, from the 2-1 victory against Brentford in November, Brighton’s right-back, Mats Wieffer, roams inside the pitch as his team-mates are building up the attack.
Wieffer’s movement puts Minteh in an isolated situation when Lewis Dunk switches the play to the right-winger. As customary, Minteh dribbles past the opponent’s left-back, Kristoffer Ajer, and creates a crossing angle.
The positioning of Wieffer forces Sepp van den Berg wide, reducing the number of players defending the cross. Welbeck capitalises on that and perfectly times his run to beat Nathan Collins and connect with Minteh’s excellent cross.

Welbeck then only needs a single touch to score the equaliser.
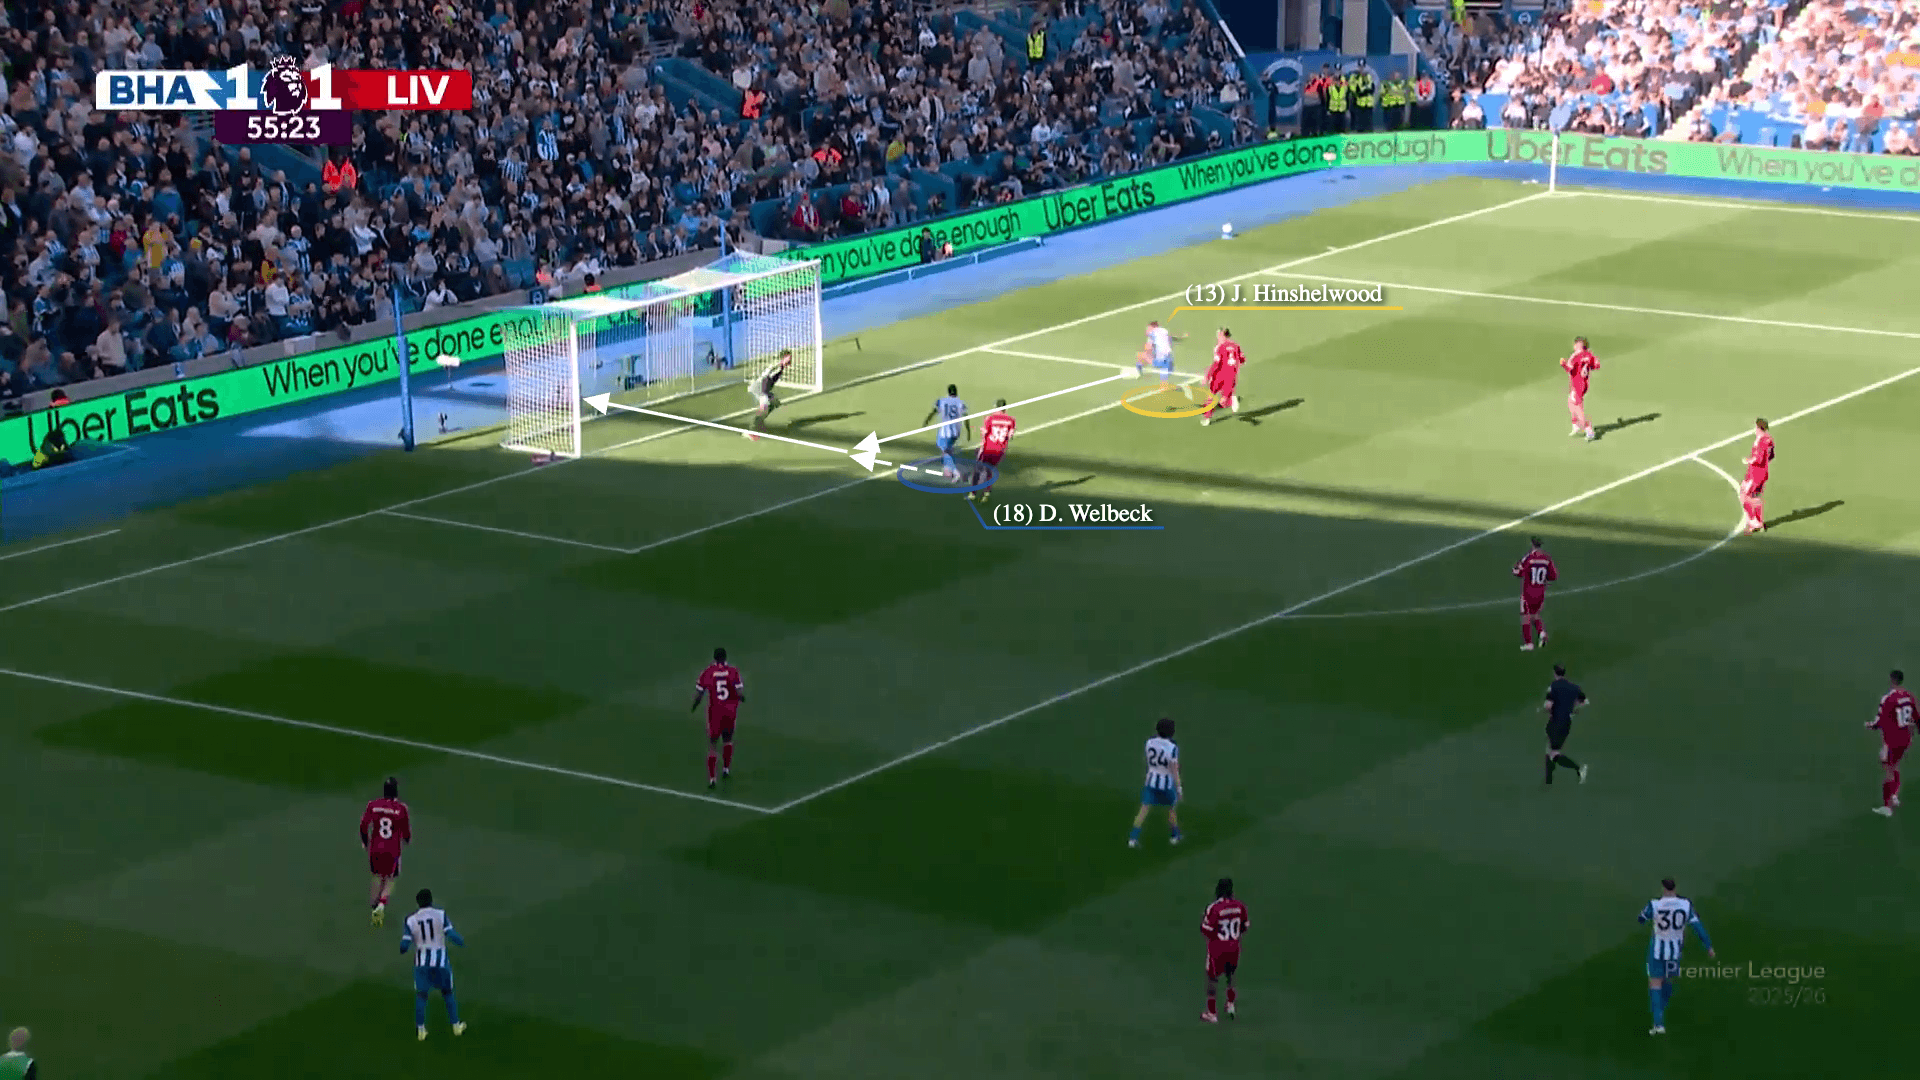
In another example, from the 2-1 victory against Liverpool last Saturday, Brighton’s left-back, Ferdi Kadioglu attacks the left half-space as Gross plays the ball to Minteh.
Kadioglu’s movement forces Ibrahima Konate to adjust his positioning, leaving Ryan Gravenberch and Virgil van Dijk to defend the cross.
In the two-v-two situation inside the penalty area, Minteh’s perfect cross gives Brighton the advantage, and the timing of Jack Hinshelwood and Welbeck’s runs snatch it.
It’s also worth noting how Welbeck and Hinshelwood cover the width of the goal with their runs…

… which proves fruitful when the Brighton midfielder squares the ball to his centre-forward, who scores the winner.
How Brighton attack their open-play crosses isn’t flashy, but its effectiveness plays a big role in their offensive threat.
What’s better than having a trademark move when attacking crosses? Mastering the basics, which makes you a threat from every angle.